
캐릭터 디자인은 Illustrator에서 할 수있는 가장 재미있는 것들 중 하나입니다. 이 튜토리얼에서는 벡터 해적 만화 캐릭터를 만들기로 결정했습니다.
최종 이미지
언제나처럼, 이것이 우리가 만들게 될 최종 이미지입니다.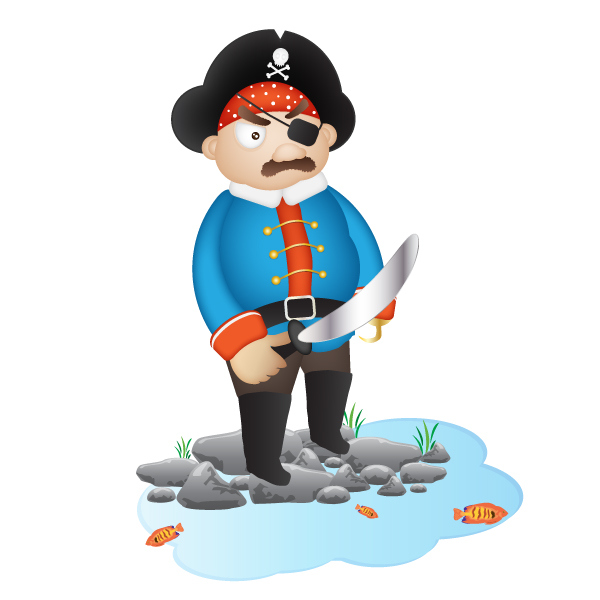
자습서 세부 정보
- 프로그램 : Adobe Illustrator CS3
- 예상 완료 시간 : 45 분
- 난이도 : 초급 - 중급
1 단계
먼저 새 문서를 만듭니다. 치수를 너비 = 600px , 높이 = 600px , 색상 모드를 RGB로 설정하십시오.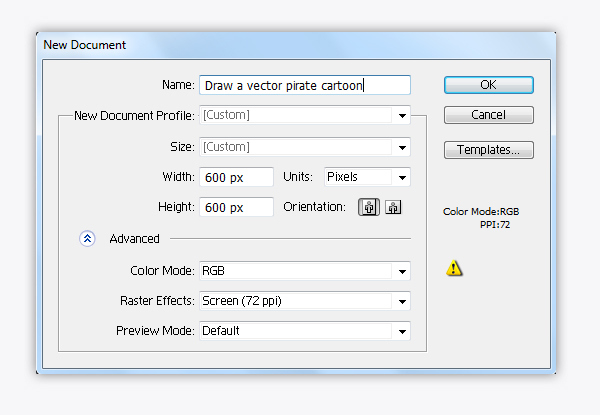
2 단계
얼굴부터 시작해 봅시다. 은 Using 펜 도구 (P은) 아래 그림에 도시 한 바와 같이 적의 표면 형상을 생성한다.
에서 견본 팔레트로 이동 >의 skintones을 견본 라이브러리> 그라디언트를 엽니 다 . 얼굴 모양을 Skintone 12 로 선택 합니다. 모양이 선택된 상태에서 [ 효과]> [스타일]> [내부 광선]으로 이동 하여 값을 설정합니다.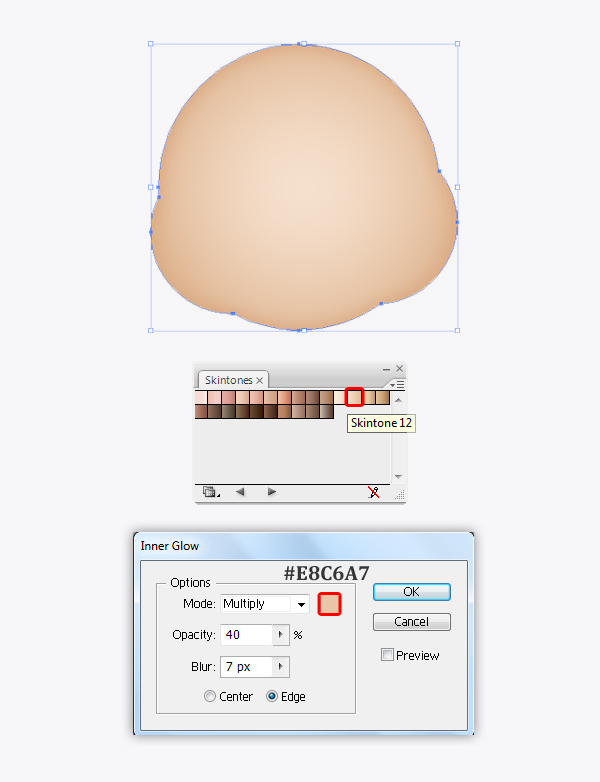
은 Using 타원 도구 (L)이 원을 그리 구배 적용 스킨 톤 (12) , 다음으로 이동 > 스타일 화> 내부 광선 시행하여 값을 설정.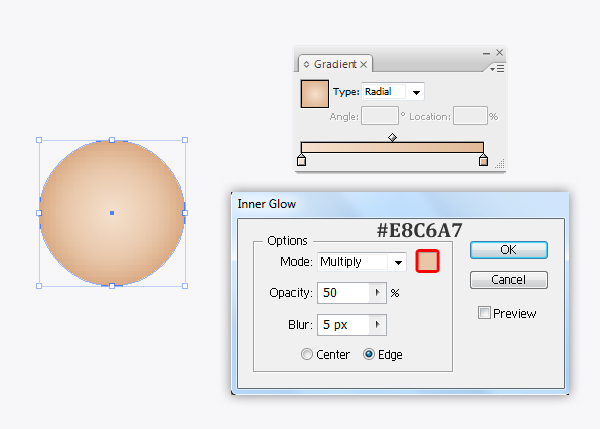
원을 복제 (Ctrl / Cmd + C, Ctrl / Cmd + F) 한 다음 조금 더 작게 크기를 조정하고 아래 이미지와 같이 배치합니다.
이 원을 그룹화 (Ctrl + G) 합니다. 이 모양은 해적의 귀를 나타냅니다. 해적의 얼굴 뒤에 귀를 놓으십시오.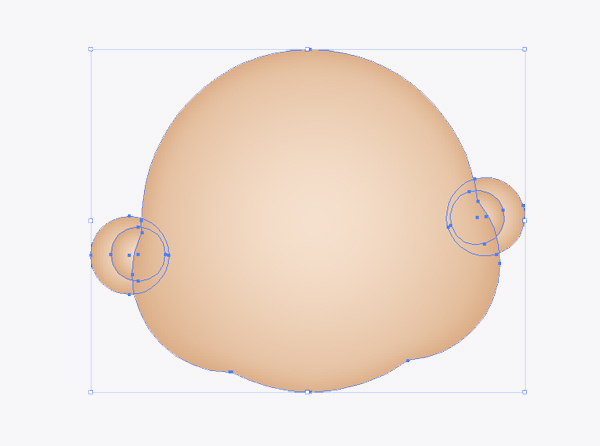
3 단계
눈에는 펜 도구 (P) 를 사용하여 아래 그림과 같은 모양을 만들고 그라디언트 Skintone 12를 적용합니다 . 그런 다음 혼합 모드를 곱하기로 변경 하고 불투명도를 20 %로 낮추십시오 .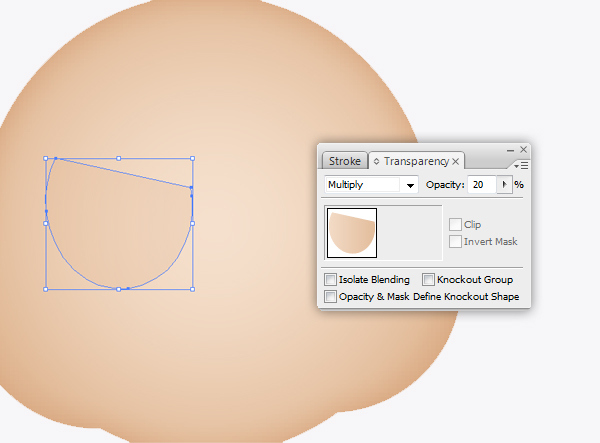
Duplicate (Ctrl / Cmd + C, Ctrl / Cmd + F) the shape we have created and paste in front, resize it a little smaller. Then change the Blending mode to Normal with Opacity = 100%.
Duplicate (Ctrl / Cmd + C, Ctrl / Cmd + F) the copy shape and paste in front, resize it a little smaller. Fill it with the gradient shown in the image below, then go to Effect > Stylize > Inner Glow and set the values.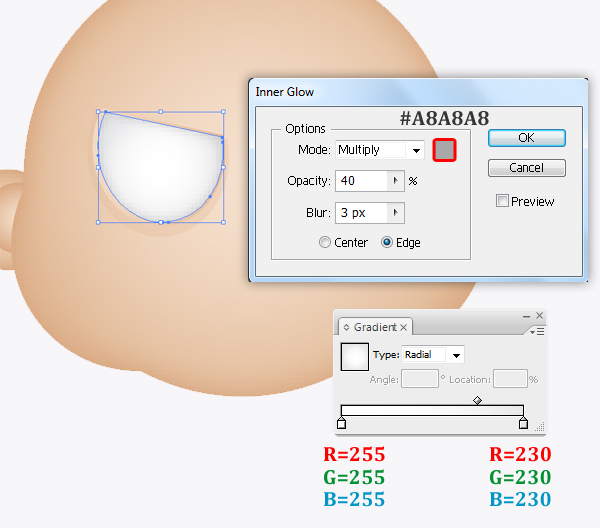
Grab the Ellipse Tool (L) and draw a small circle for the pupil. Then fill it with the gradient indicated.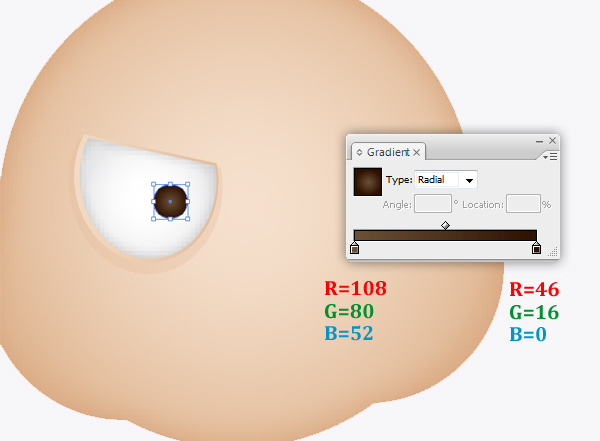
Add two more white circles to represent the sparkle in the eyes. Now we have a result like this.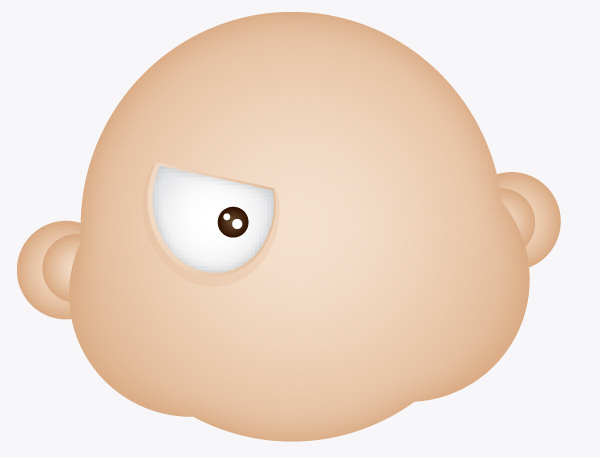
Step 4
For the nose I’ve used the Pen Tool (P) to create the shape shown in the image below and applied the gradient Skintone 12. Then change the Blending mode to Multiply and lower Opacity = 80%.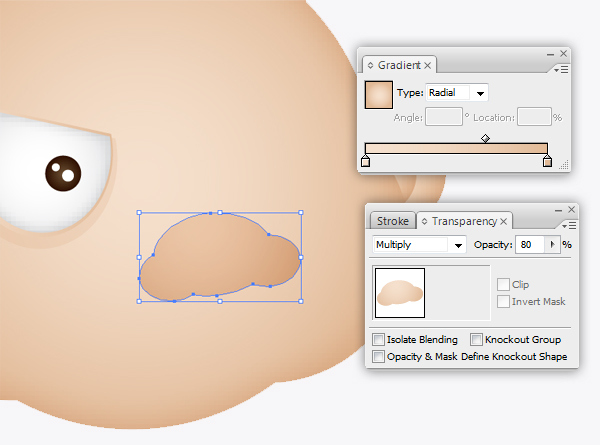
With the nose shape still selected, duplicate (Ctrl / Cmd + C, Ctrl / Cmd + F) it and paste in front, move it up a little bit and change the Blending mode to Normal with Opacity = 100%. Then go to Effect > Stylize > Inner Glow and set the values.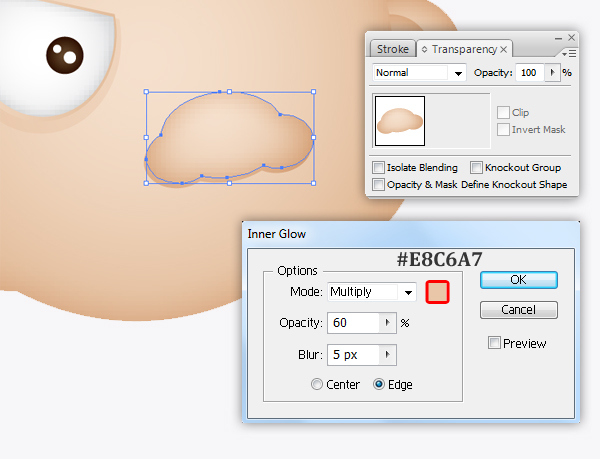
Step 5
Now we create the pirate’s mustache. Pick the Pen tool (P) and draw a shape as shown in the image below. Then add the gradient Skintone 12 and change the Blending mode to Multiply and lower Opacity = 50%.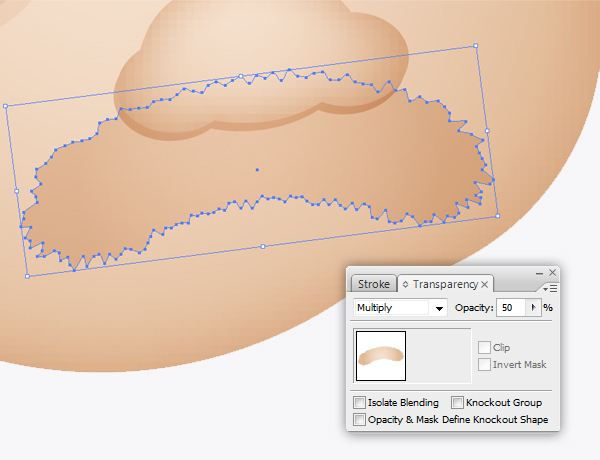
Duplicate (Ctrl / Cmd + C, Ctrl / Cmd + F) the mustache shape we have created and paste in front, move it up a little bit, apply the gradient Skintone 20. Then change the Blending mode to Normal with Opacity = 100%.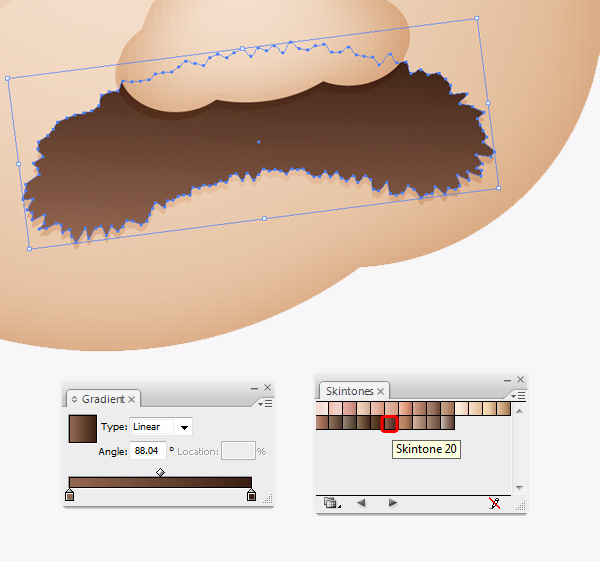
Step 6
Pick the Pen tool (P) to create the pirate’s eyebrow as shown in the image below then repeat step 5 and you will get the result like this.
Duplicate (Ctrl / Cmd + C, Ctrl / Cmd + F) the eyebrow shape, scale it a little smaller and pick Reflect Tool (O) to reflect the copy shape.
Step 7
In this step, we will create the eye patch for our pirate. Use the Rounded Rectangle Tool to create the main shape of eye patch, then use the Pen Tool (P) to create the strings.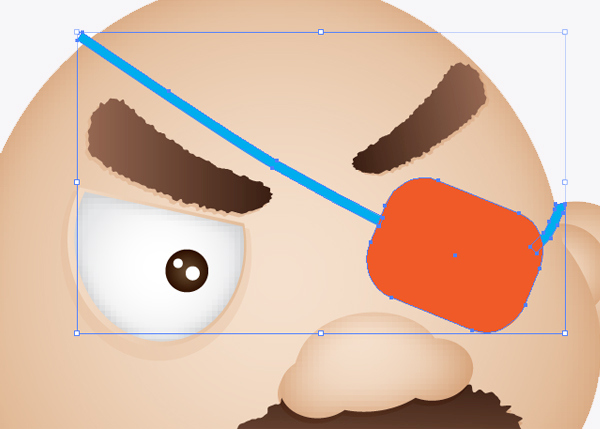
Apply the gradient Skintone 12 to the eye patch, then apply the Blending mode Multiply with lower Opacity = 40%.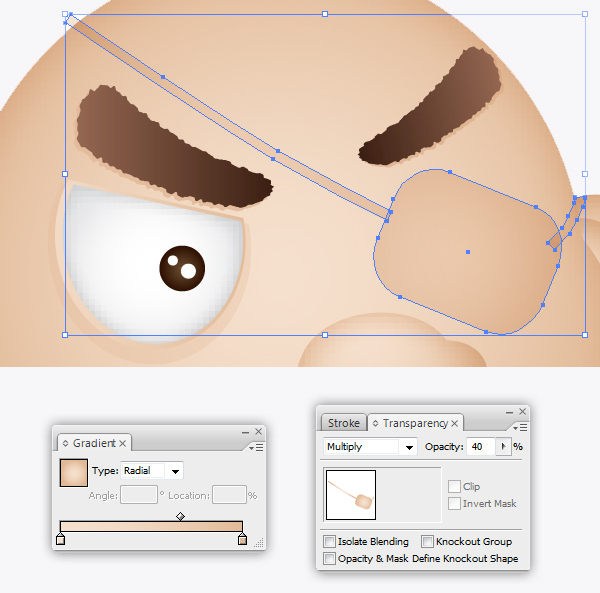
우리가 만든 눈 패치 모양을 복제 하여 앞에 붙여 넣은 다음 (Ctrl / Cmd + C, Ctrl / Cmd + F) 조금씩 위로 움직여서 Skintone 20 그라디언트를 적용하십시오 . 그런 다음 혼합 모드를 불투명도 = 100 %의 표준 으로 변경하십시오 .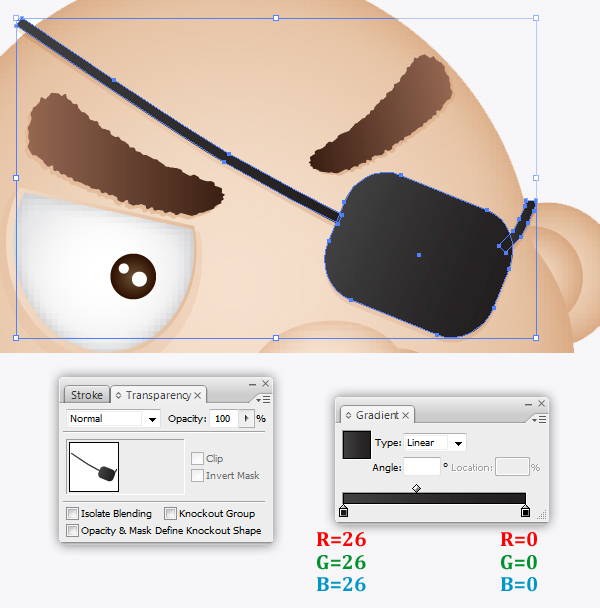
8 단계
두건으로 재미있게 놀고 펜 도구 (P) 를 선택하여 아래 그림과 같은 모양을 만듭니다. 그래디언트 그것을 채울 스킨 톤 12 은 블렌딩 모드에 적용 곱하기 낮은 불투명도 = 50 % .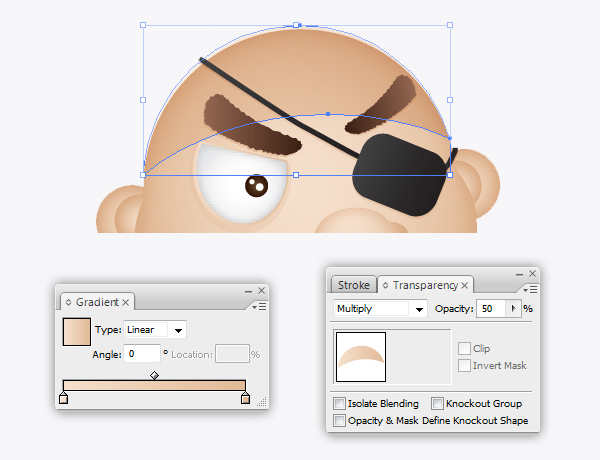
우리가 만들고 앞에서 붙인 반다나 모양을 복제 (Ctrl / Cmd + C, Ctrl / Cmd + F) 한 다음 조금 움직여서 # F05A28 색상을 적용하십시오 . 그런 다음 혼합 모드를 불투명도 = 100 %의 표준 으로 변경하십시오 . [ 효과]> [스타일 화]> [내부 광선]으로 이동 하여 값을 설정합니다.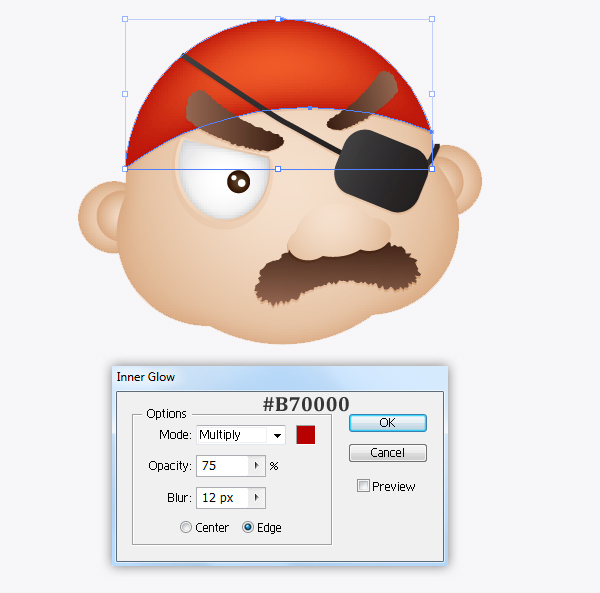
해적의 두건에 흰 점들을 추가하고 타원 도구 (L)를 사용하십시오 . 이제 당신은 이런 결과를 얻습니다.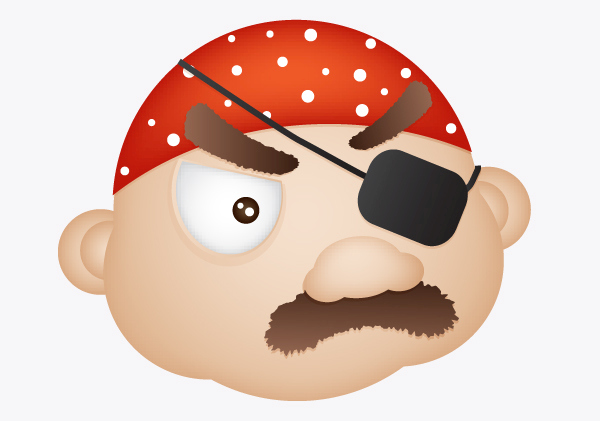
9 단계
이제 캐릭터에게 멋진 3 각형 모자를 추가 할 차례입니다. 펜 도구 (P) 를 선택하여 아래 그림과 같은 모양을 만들고 # 333333으로 채 웁니다 .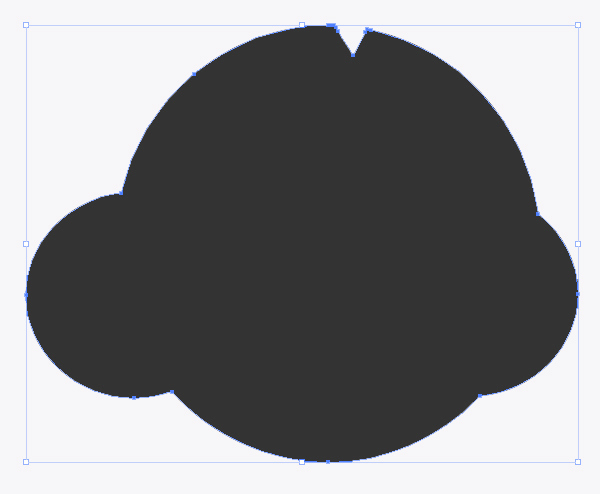
Duplicate (Ctrl / Cmd + C, Ctrl / Cmd + F) the copy shape and paste in front, resize it a little smaller. Fill it with the gradient shown in the image below, then go to Effect > Stylize > Inner Glow and set the values.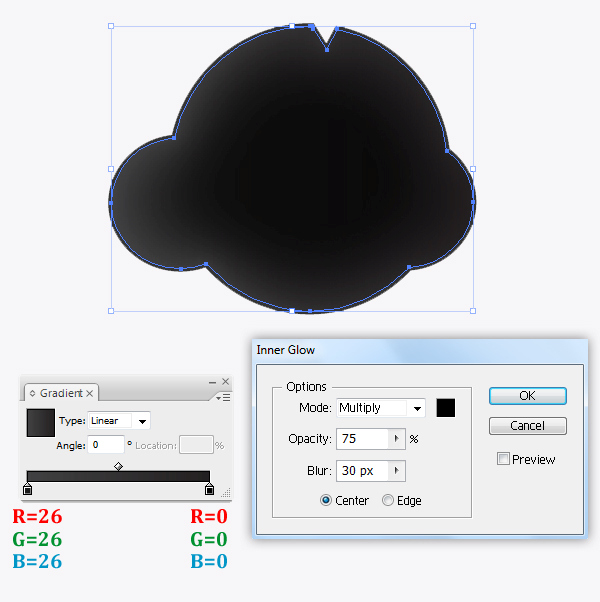
Once the hat is complete, we are going to add the skull head symbol. Just pick the Pen tool (P) to draw a shape as shown in the image below, then use the Ellipse tool (L) to create his eye.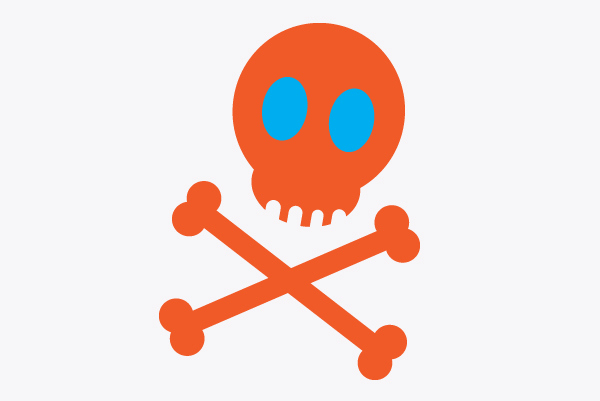
Apply the gradient indicated for the crossed bones.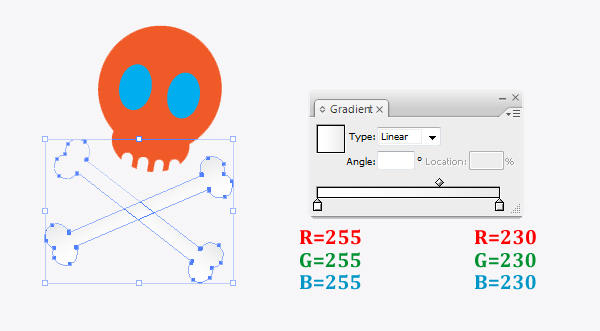
We continue to apply the same gradient for the skull and eyes, just change the Gradient angle to Radial.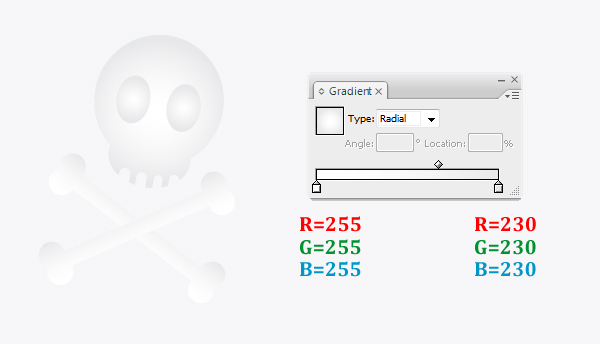
Now you should get the result shown in the image below.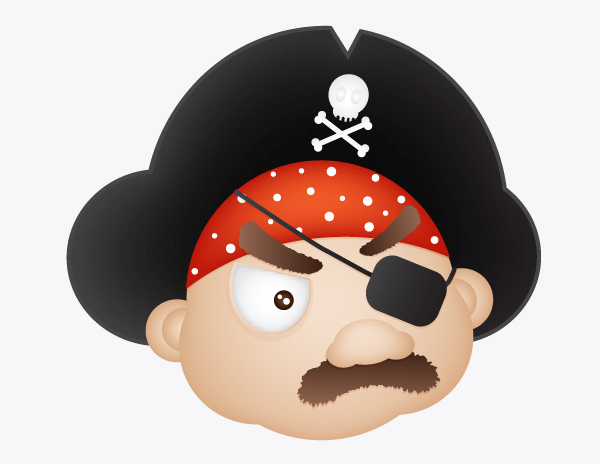
Step 10
We’re going to draw the costume for our pirate. To start, the collar of the shirt is two rounded rectangles. Fill them with color #F2F2F2, then go to Effect > Stylize > Inner Glow and set the values.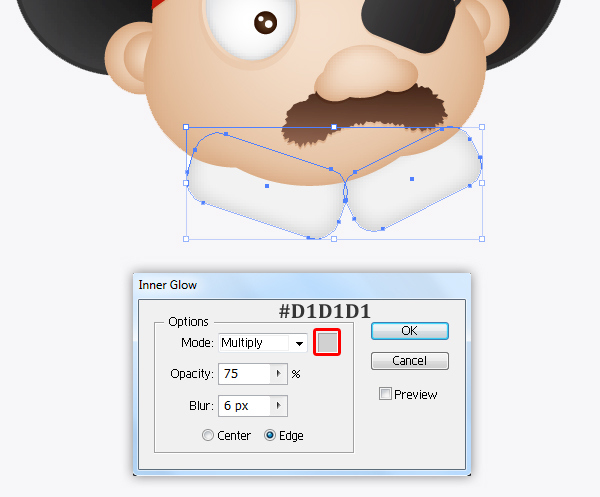
We continue with the waistcoat, pick the Pen Tool (P) to create the shapes shown in the image below and fill them with color #26A9E0, , then go to Effect > Stylize > Inner Glow and set the values.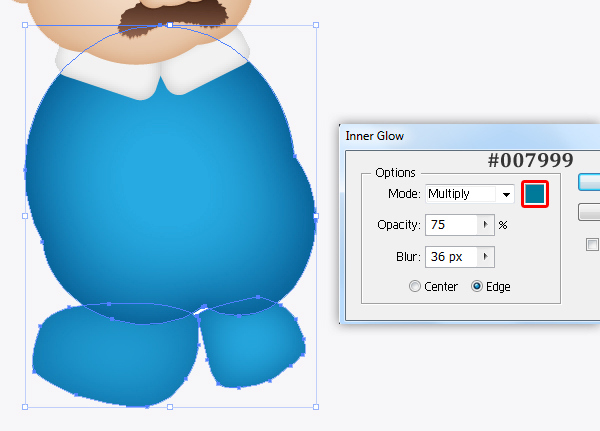
Grab the Pen Tool (P) to create a shape as shown in the image below and fill it with color #F05A28, then go to Effect > Stylize > Inner Glow and set the values.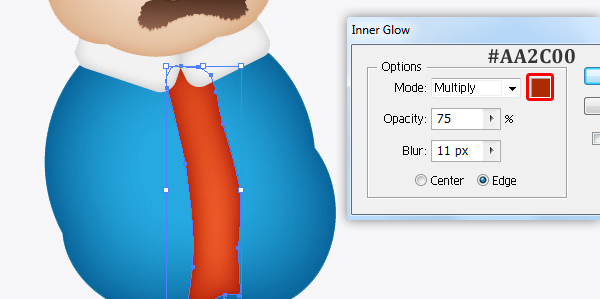
우리는 양복 조끼를위한 화려한 버튼을 만들 예정입니다. 그냥 사용 타원 도구 (L)을 , 아래 그림과 같이 2 원을 생성 한 후 할 수있는 혼합 모드 변경 지시 그라디언트로 채우기 곱을 .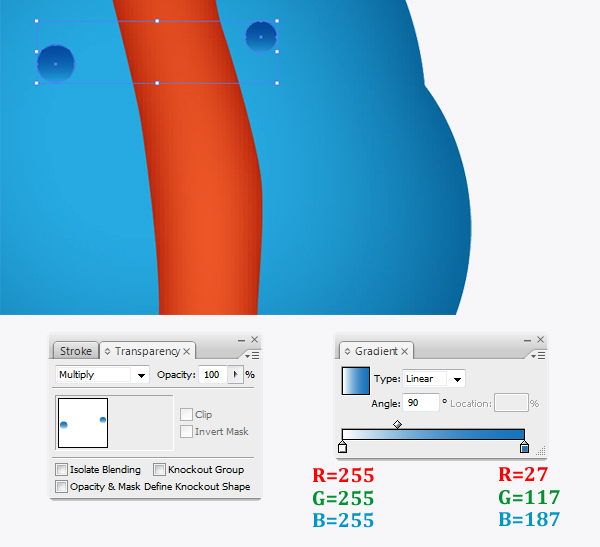
우리는 계속 사용할 픽크 툴 (P)를 다음 위해 혼합 모드를 변경, 도시 된 바와 같이 라인을 생성하기 위해 같은 그라데이션 채우 곱 하부와 불투명도 = 50 % .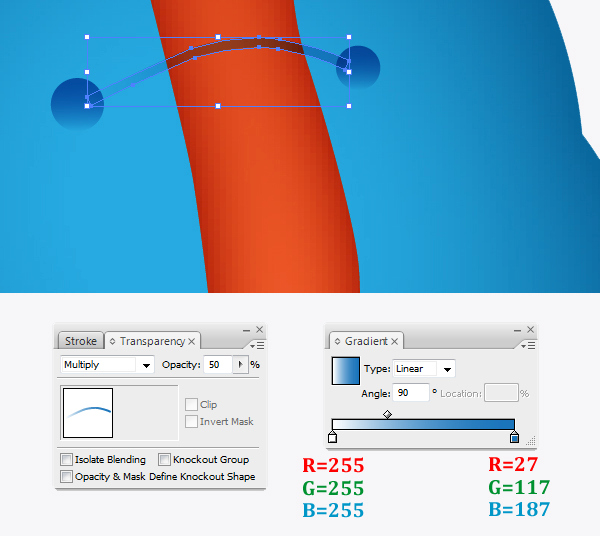
중복 된 (Ctrl / Cmd + C, Ctrl / Cmd + F) 팬시 버튼 모양을 만들고 붙여 넣은 다음 조금씩 위로 이동하십시오. 에서 견본 팔레트로 이동 > 금속을 견본 라이브러리> 그라디언트를 엽니 다 . 버튼에 대해 Gold Radial을 선택 합니다. 그런 다음 Blending 모드를 Normal with Opacity = 100 %로 변경 합니다.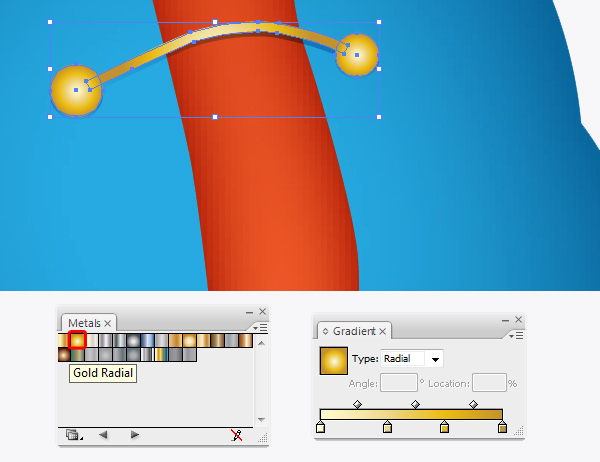
모든 멋진 버튼 요소를 그룹화 (Ctrl + G) 합니다. 그런 다음 2 번 더 복제하고 아래 이미지와 같이 배치하십시오.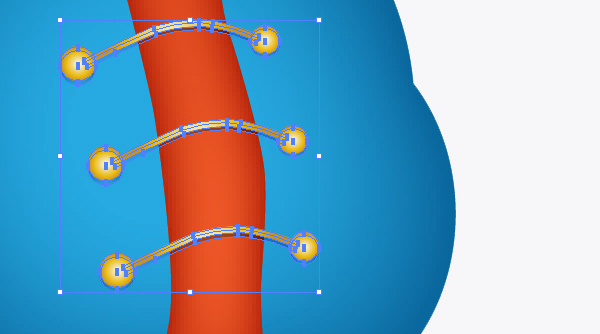
For the belt, use the Rounded Rectangle Tool (M) to draw two large rounded rectangles to create the buckle. Place as shown in the image below, and under the Pathfinder Panel hit the Subtract from shape area button. Make sure to expand the shape.
Select Object > Expand Appearance. It will turn the object into an editable shape. This shape represents the highlight on the plate. In the Swatches palette, go to Open Swatches Library > Gradients > Metals> White Gold.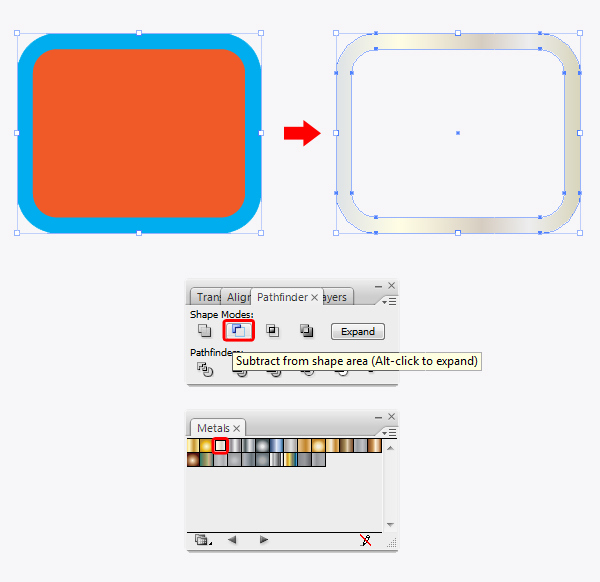
Pick the Pen Tool (P) to create the belt shape. Apply the gradient indicated for the belt.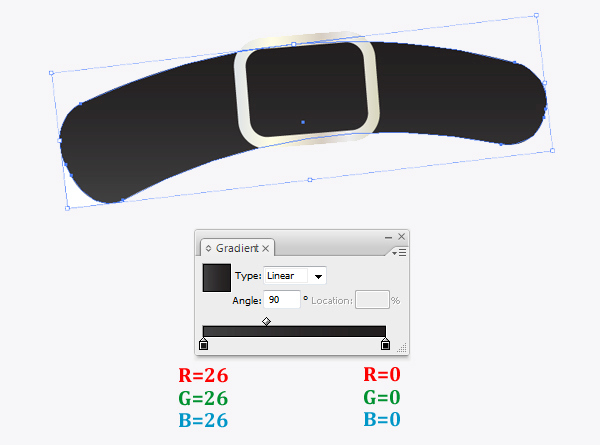
Place the belt as shown in the image below.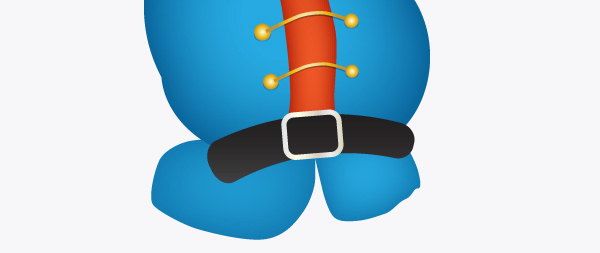
Now we create the sleeves, pick the Pen Tool (P) to draw a shape as shown in the image below, and fill it with color #26A9E0. Then go to Effect > Stylize > Inner Glow and set the values.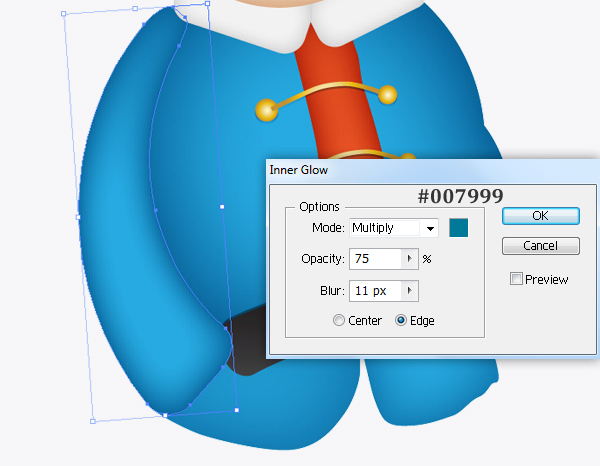
Continue working on the sleeves, pick the Pen Tool (P) to draw a new shape as shown in the image below, and fill it with color #F05A28. Then go to Effect > Stylize > Inner Glow and set the values.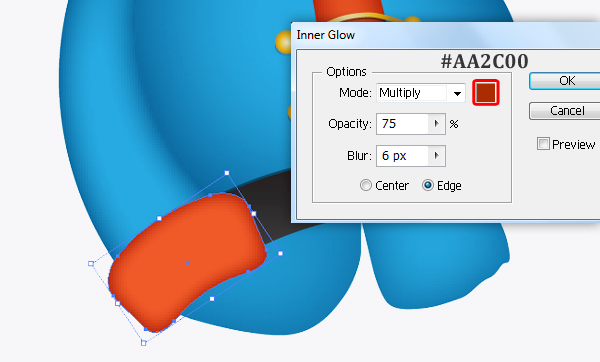
Use the Pen Tool (P) to draw a stripe as shown in the image below, fill it with color #F2F2F2.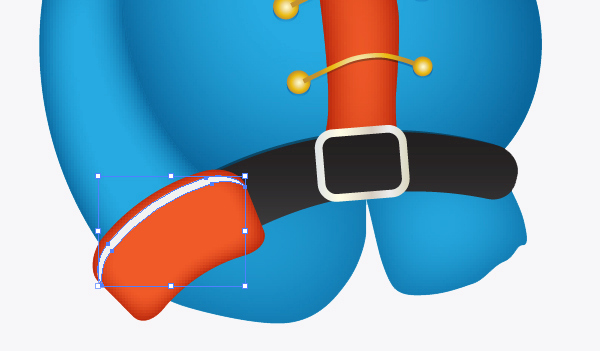
Now we duplicate the sleeves and pick th Reflect Tool (O) to reflect the copy shape.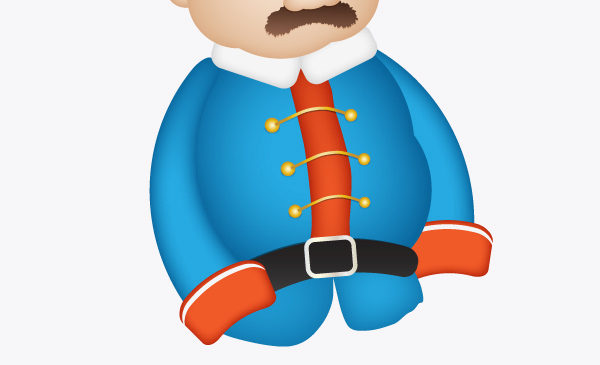
Step 11
이 단계에서는 바지를 그릴 것입니다. 펜 도구 (P) 를 선택하여 아래 그림과 같이 두 가지 모양을 만듭니다. 색상 # 5A4A42로 채 웁니다 . 그런 다음 [ 효과]> [스타일 화]> [내부 광선]으로 이동 하여 값을 설정합니다.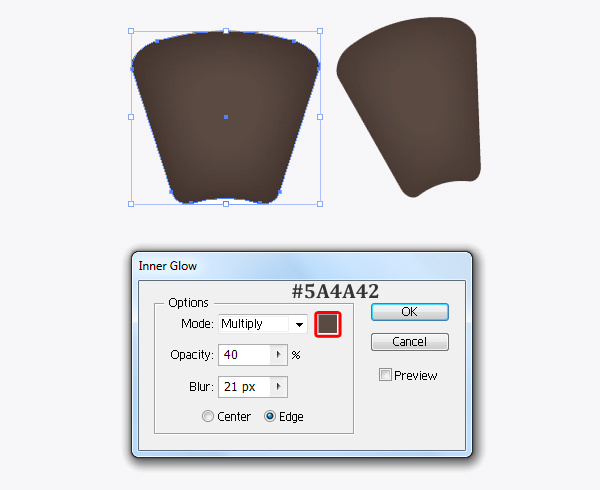
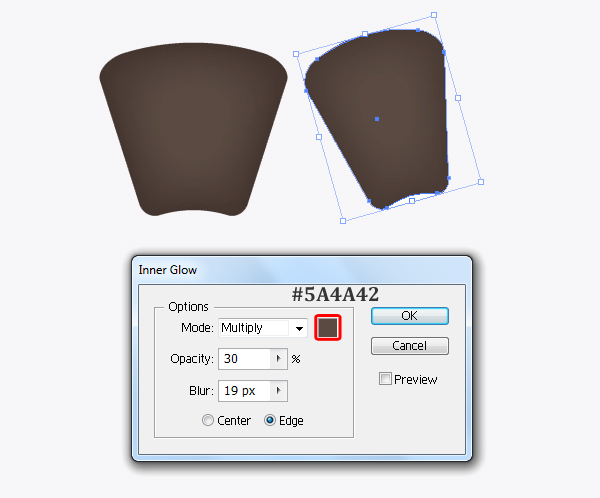
이제 우리는 이러한 모양을 이와 같이 배치합니다.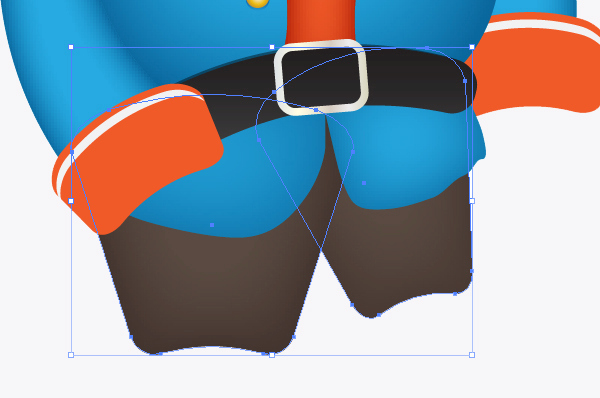
12 단계
부츠의 경우 펜 도구 (P) 를 사용하여 아래 이미지와 같은 모양을 만듭니다. 표시된 그라디언트로 채 웁니다.
우리가 만든 부팅 모양을 복제 (Ctrl / Cmd + C, Ctrl / Cmd + V) 한 다음 이와 같이 배치하십시오.
13 단계
In this step, we’re going to create the pirate’s hand. Pick the Pen Tool (P) to create the hand shape and fill it with gradient Skintone 13. Then go to Effect > Stylize > Inner Glow and set the values.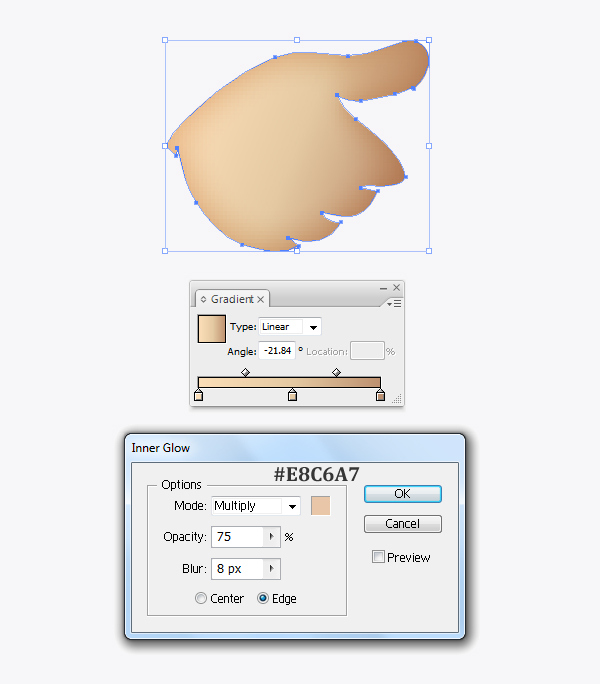
Pick the Pen Tool (P) to draw a hook for our pirate character. In the Swatches palette, go to Open Swatches Library > Gradients > Metals. We select Gold for the hook.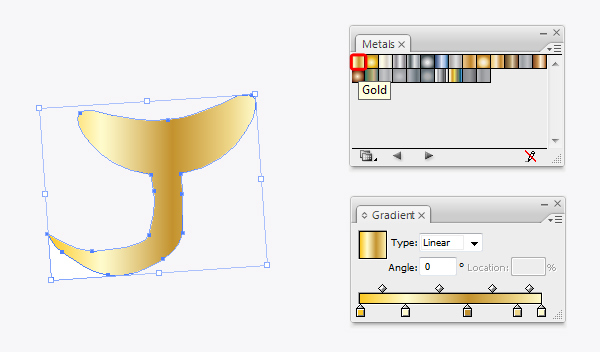
Now we place the hand and hook as in this image.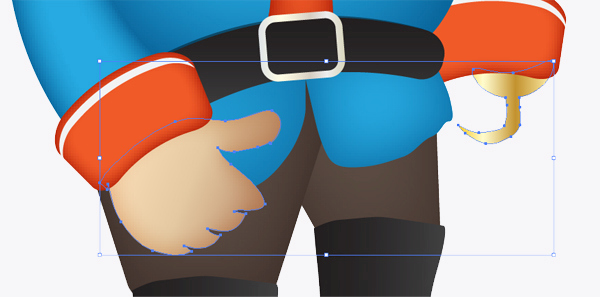
Step 14
Now we’re going to create a sword for our pirate character. Grab the Pen Tool (P) to draw the outline as shown in the image below.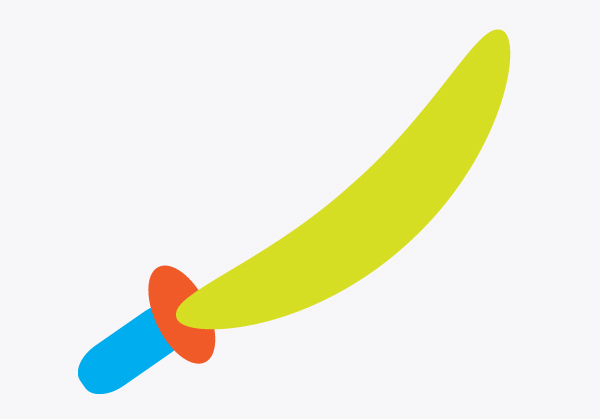
검의 손잡이에 색 # 231F20으로 채 웁니다 . 그리고 cross-guard가 선택된 상태에서 color # 4D4D4D로 채운 다음 Effect> Stylize> Inner Glow 로 이동 하여 값을 설정합니다.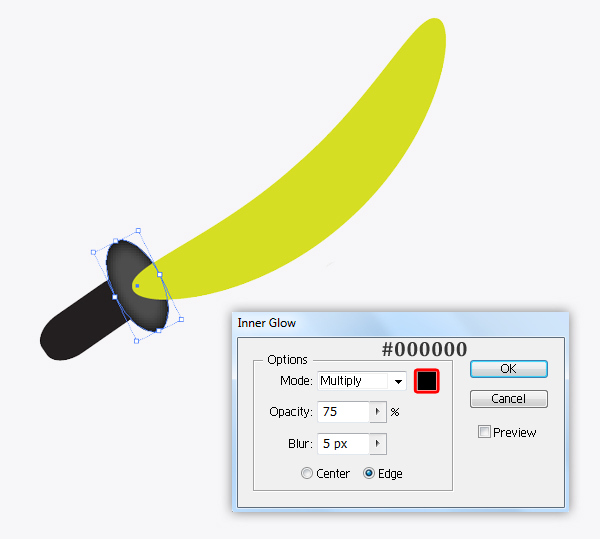
검의 칼날에 그라디언트 실버 를 적용하십시오 .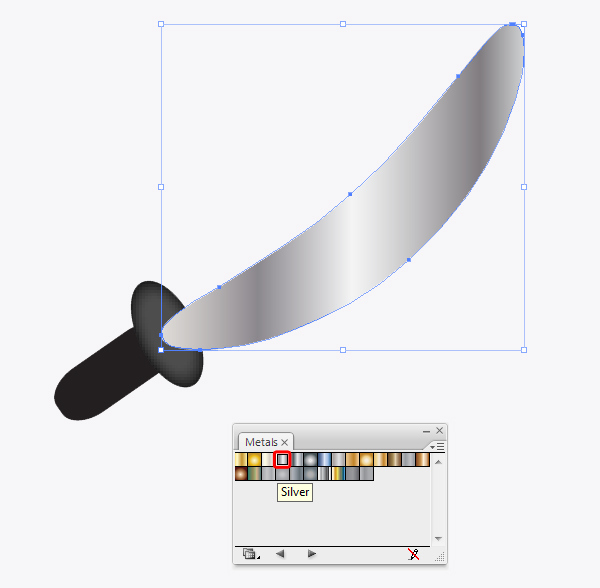
검의 칼날이 선택된 상태에서 대상> 경로> 옵셋 경로로 이동 합니다.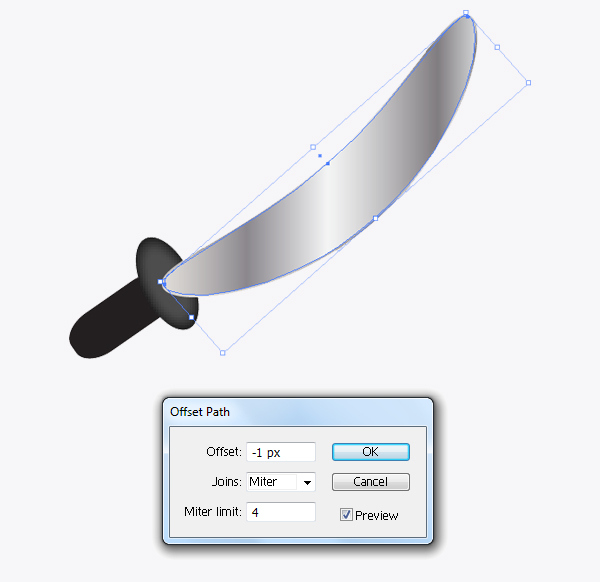
우리는 검의 칼날 색이 복사 (Ctrl / Cmd + C, Ctrl / Cmd + F) 한 것 보다 훨씬 가벼우 며 블렌딩 모드를 오버레이로 변경 합니다.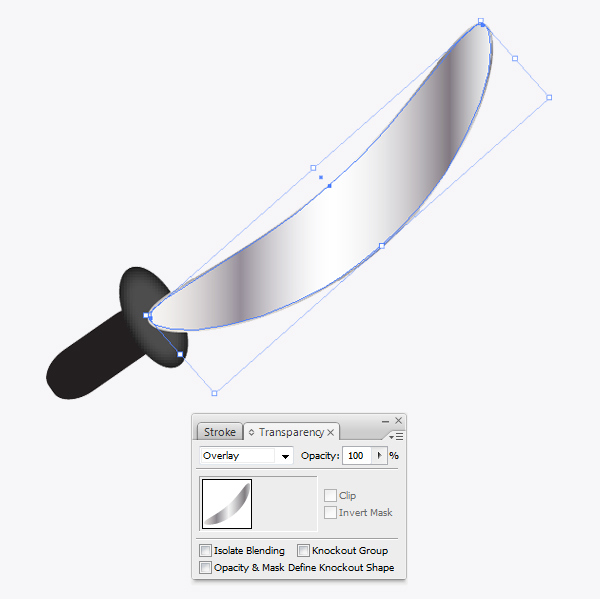
이제 우리는 아래 이미지와 같이 검을 놓습니다.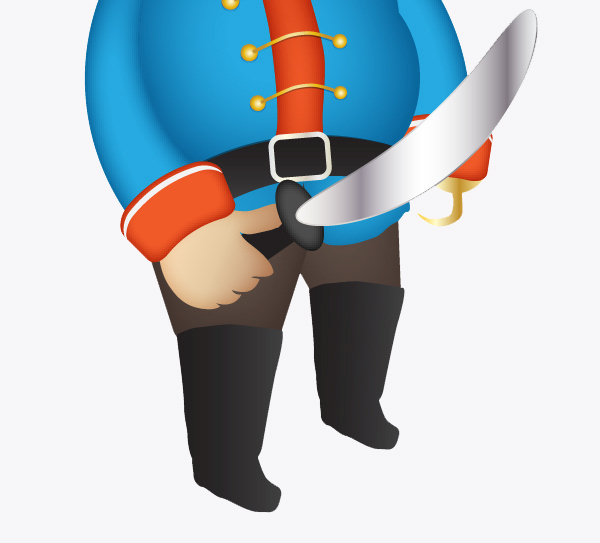
15 단계
에서 기호 팔레트로 이동 심볼 라이브러리> 자연을 엽니 다 . Rock 3 , Rock 4 , Rock 5 기호를 선택하고 아래와 같이 배치하십시오.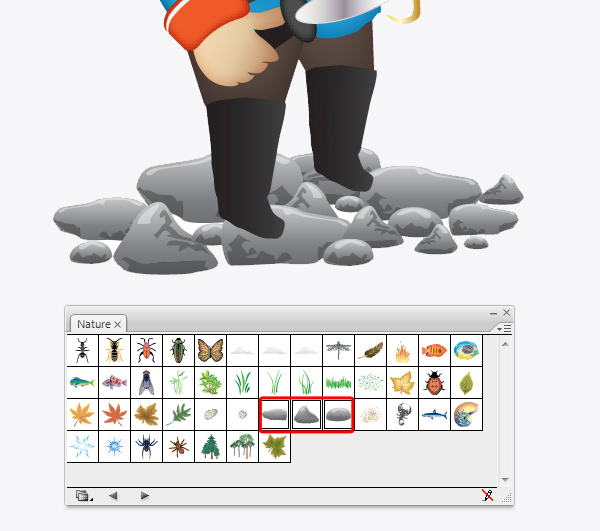
우리는 상징으로 작업을 계속하고, 이제 우리는 Grass 1 을 선택 하고 이것을 이렇게 배치합니다.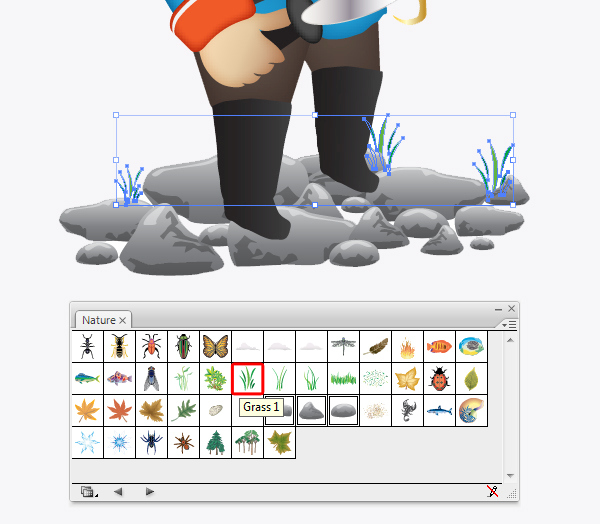
이제 우리는 물고기 1 을 선택하고 이렇게 배치합니다.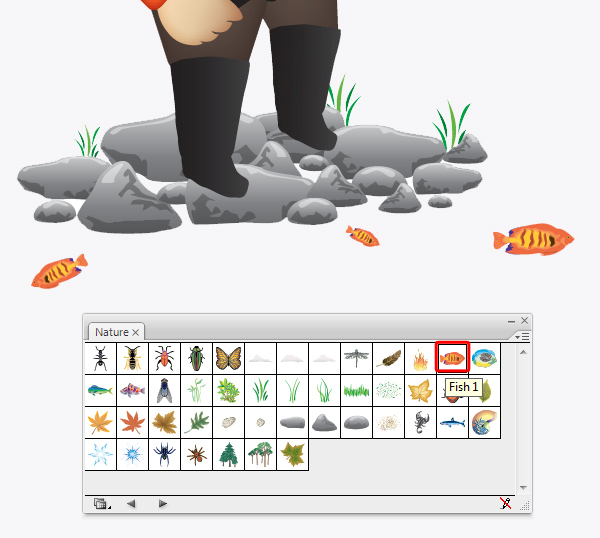
나는 물을 조금 더해서 바위 밑에 넣고 싶다. 펜 도구 (P)를 선택하고 아래 그림과 같은 모양을 그립니다. 에서 견본 팔레트로 이동 견본 라이브러리> 그라디언트> 파스텔을 엽니 다 . 물에 그라디언트 Blue 를 선택합니다 .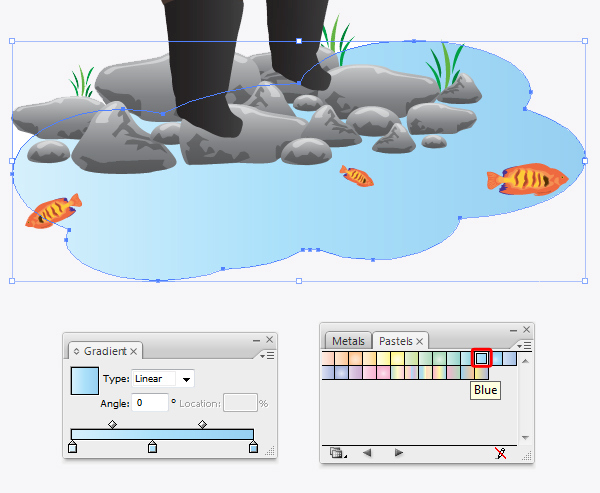
물을 복제하여 (Ctrl / Cmd + C, Ctrl / Cmd + V) 물을 앞에 붙여넣고 복사를 오른쪽으로 조금 이동하십시오. 그런 다음 복사본 의 혼합 모드를 Softlight 로 변경하십시오 .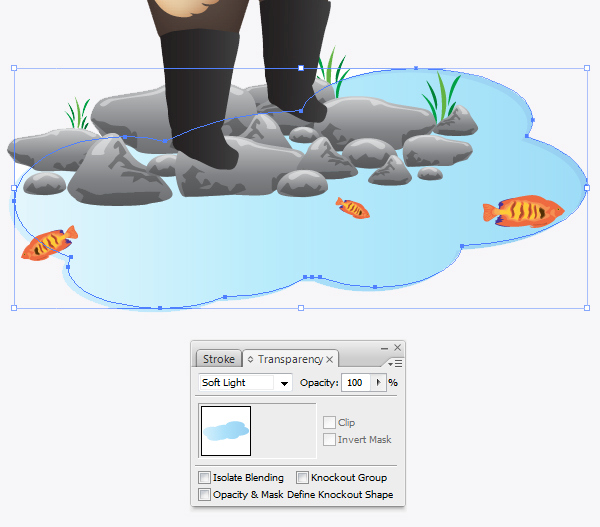
그리고 우리는 완료되었습니다!
여기 그것이 어떻게 보일 것입니다. 이 튜토리얼을 마음껏 즐기시고 앞으로의 프로젝트에서 이러한 기술을 적용 해 주시길 바랍니다.
'디자인 > 무료 디자인 자습서' 카테고리의 다른 글
| [일러스트] 초콜렛 묻힌 딸기 벡터 그리는 방법 (0) | 2018.06.09 |
|---|---|
| [일러스트] 체리 컵케익 그리는 방법 (0) | 2018.06.08 |
| [일러스트] 편집 가능한 3D 텍스트 효과를 만드는 방법 (0) | 2018.06.08 |
| [일러스트] 아침식사 달걀과 소시지 일러스트 그리기 (0) | 2018.06.08 |
| [일러스트] Fire Text 효과를 만드는 방법 (0) | 2018.06.07 |
| [일러스트] 붉은악마 뿔 머리띠 그리는 방법 (0) | 2018.06.07 |
| [일러스트] 컴퓨터 마우스를 그리는 방법 (0) | 2018.06.06 |
| [일러스트] 맛있는 피자 일러스트 만드는 방법 (0) | 2018.06.06 |


댓글